

General
Company identity, support and legal links, languages, and read-only instance information.
Your company name, logo, legal and support links, and the languages you offer are what users actually see on the sign-in and consent screens. They are configured on the General tab, which also shows read-only information about the instance itself.
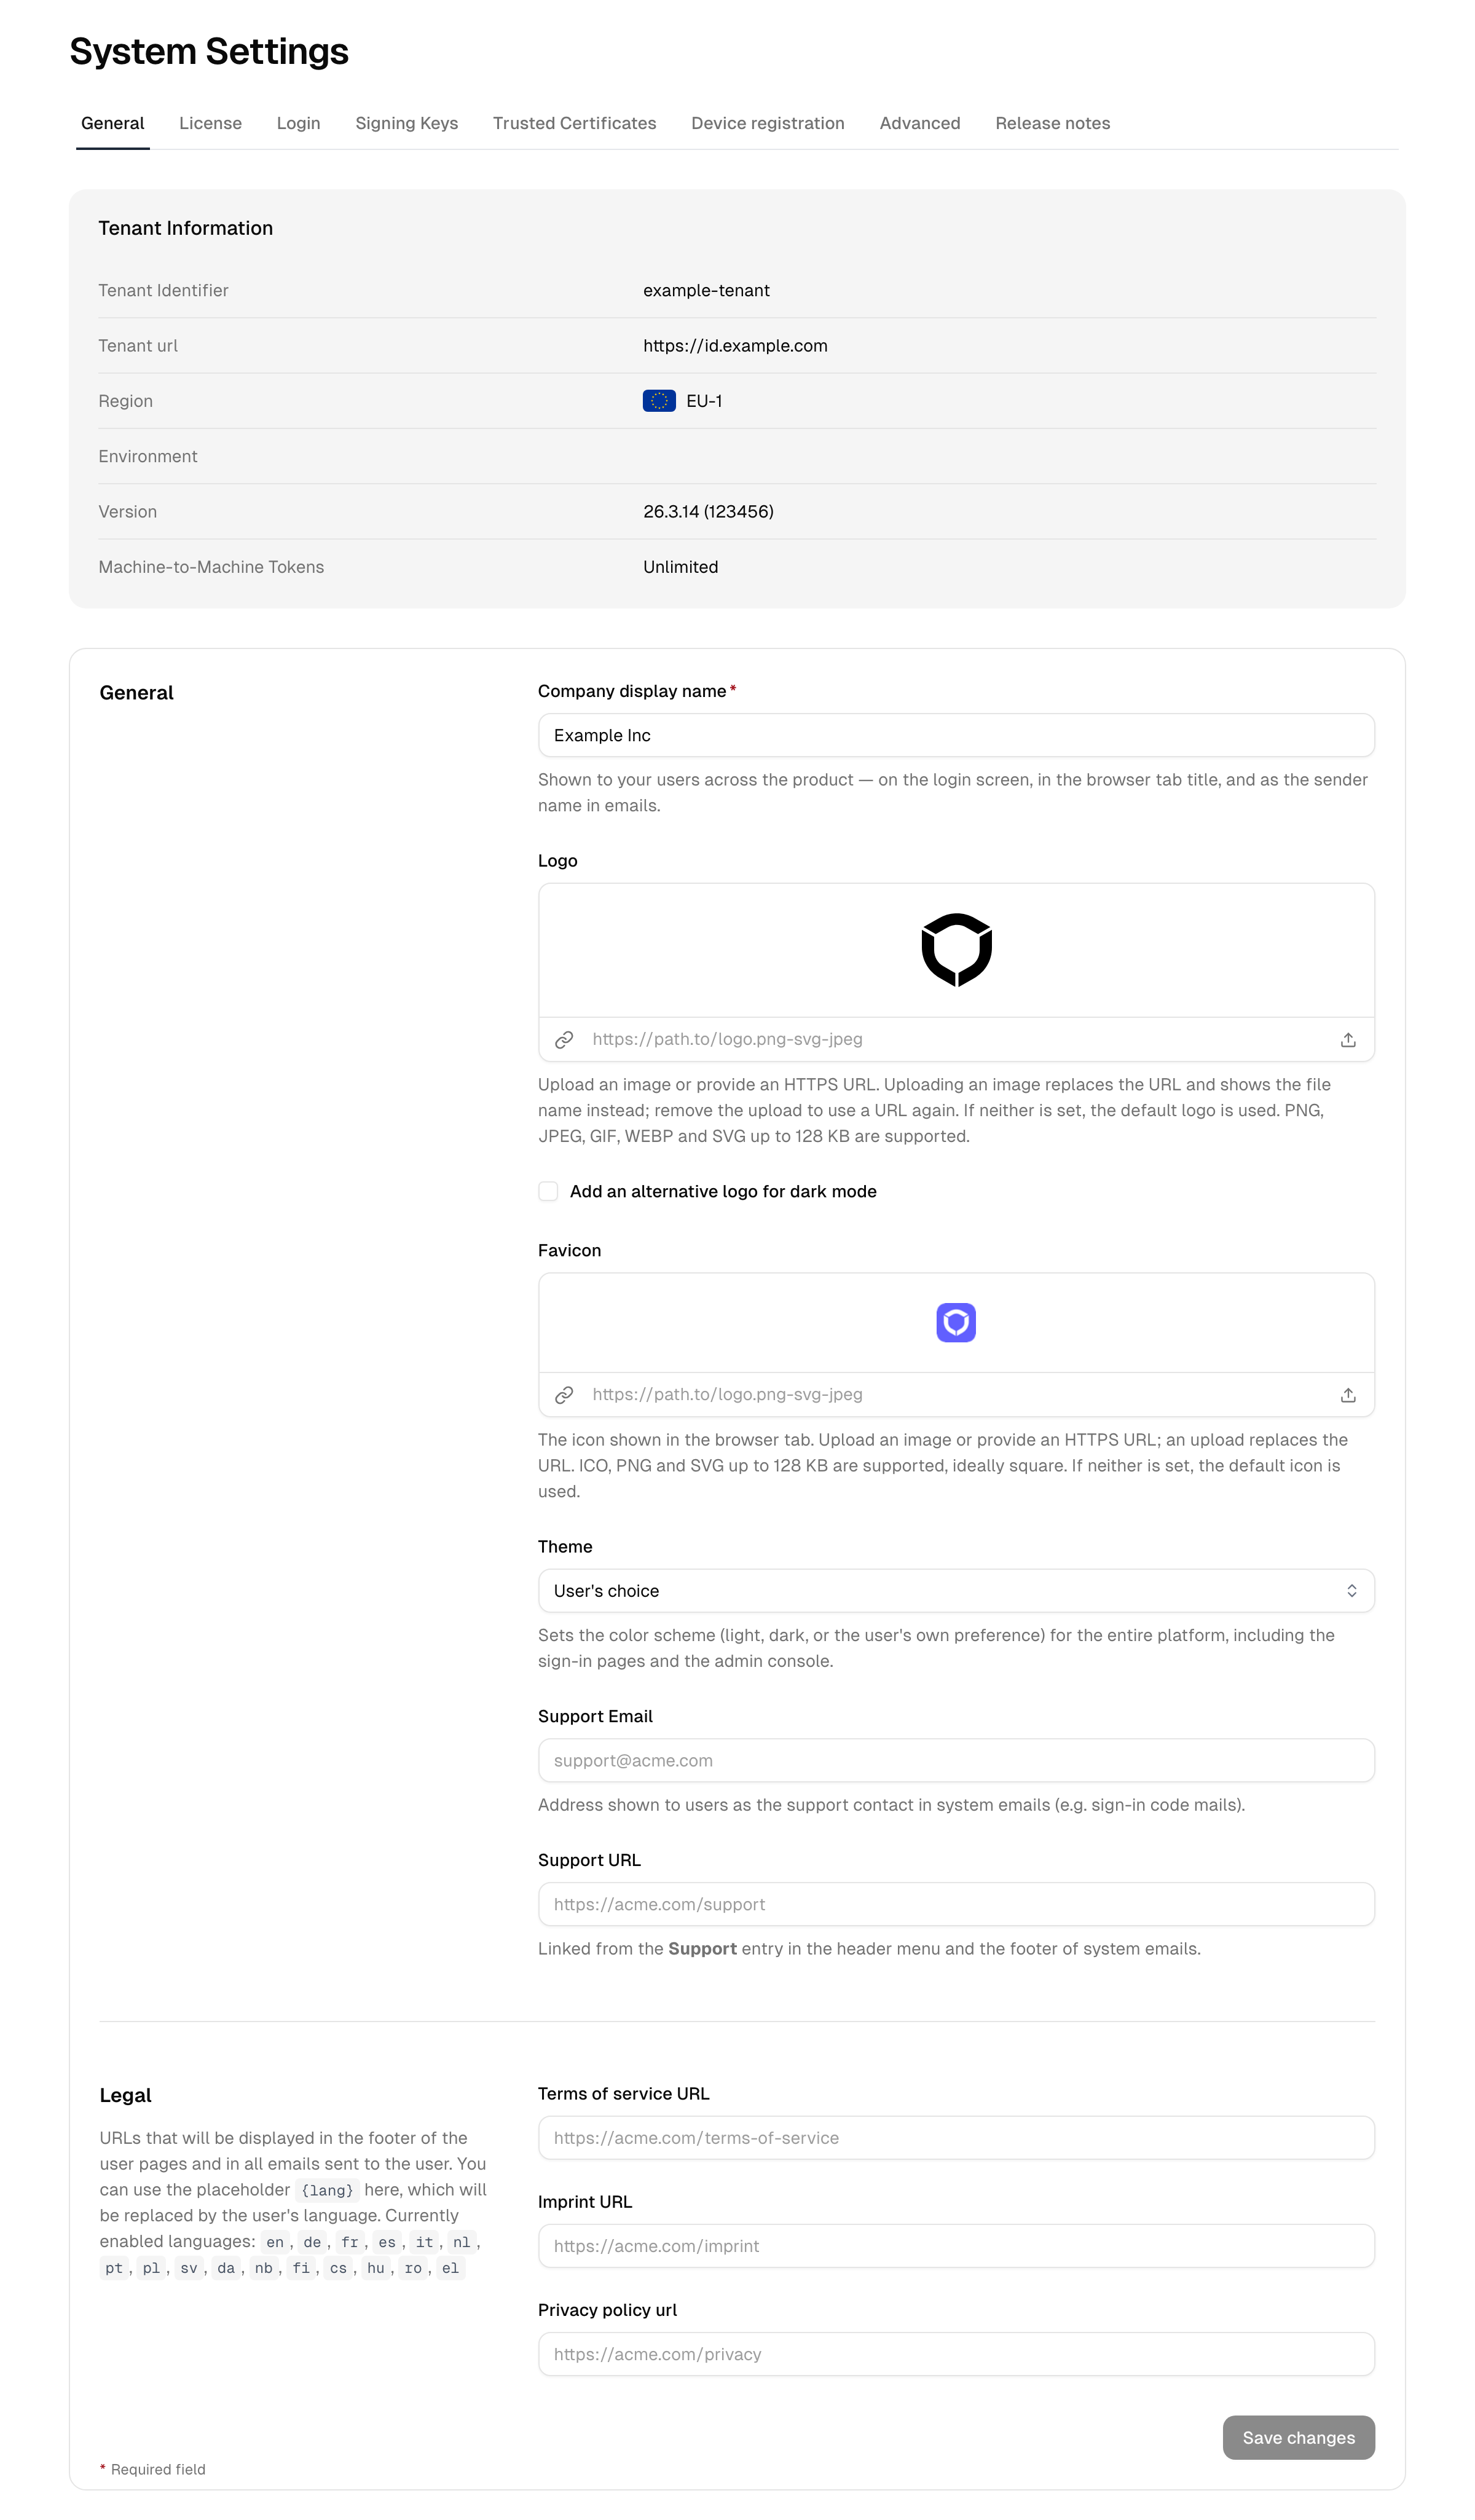
Instance information
The top of the page lists facts about this instance that you cannot edit here:
| Field | Meaning |
|---|---|
| Tenant identifier | The unique identifier of this instance |
| Tenant URL | The issuer URL — the base address applications use for single sign-on |
| Region | The data-residency region of the deployment |
| Environment | Which environment this instance is (for example production or test) |
| Version | The platform version currently running |
Company information
These fields personalize the sign-in experience and the footer of system-generated pages and emails.
- Open Settings → General.
- Set the Company display name — the name shown to users (required).
- Set the Logo in one of two ways: select Choose image (or drag a file onto the preview) to upload it, or enter an HTTPS URL in the field below the preview. PNG, JPEG, GIF, WEBP and SVG files up to 128 KB are accepted. The two share one row and are one setting: uploading an image clears the URL and shows the file name in its place, until the upload is removed with the bin icon. If neither is set, the default logo is used. For richer theming (colours, dark mode background, full appearance), use Branding → Appearance.
- Tick Add an alternative logo for dark mode to provide a second logo, uploaded or by URL, used on dark backgrounds. Unticking the option discards a logo uploaded there.
- Set the Favicon, the icon browsers show in the tab. It works the same way as the logo: upload a file or enter an HTTPS URL, and an upload replaces the URL. ICO, PNG and SVG files up to 128 KB are accepted; a square image gives the best result.
- Choose a Theme — whether the platform renders in light or dark mode, or follows each user's own preference. It applies everywhere, including the sign-in pages and the Admin Console, which is why it lives here rather than under Branding.
- Click Save changes.
Support contact
Two optional fields give users a way to reach you: Support email and Support URL. Set either or both and click Save changes.
Legal links
The Legal section lets you point users at your own legal documents. These links appear on sign-up and consent screens.
| Field | Used for |
|---|---|
| Terms of service URL | Link to your terms of service |
| Imprint URL | Link to your imprint / legal notice |
| Privacy policy URL | Link to your privacy policy |
Enter full URLs (e.g. https://example.com/privacy) and click Save changes.
Languages
The language section controls which languages users can choose from and which one is used by default.
- Choose a Default language — the language used when a user has expressed no preference.
- Under Supported languages, tick every language you want to make available. The default language is always included and cannot be unticked.
- Click Save changes.
Note: Removing a supported language affects which legal-link locales are expected and which languages users can select. Languages marked [beta] are available but not yet fully translated.
Reference
| Setting | Notes |
|---|---|
| Company display name | Required; shown to users |
| Logo URI | HTTPS image URL; falls back to the default logo |
| Dark-mode logo | Optional second logo for dark backgrounds |
| Theme | Light, dark, or user preference; applies platform-wide incl. the Admin Console |
| Support email / URL | Optional help contact surfaced to users |
| Legal links | Terms, imprint, privacy — shown on sign-up/consent |
| Default language | Fallback UI language |
| Supported languages | The selectable set; default always included |